Hello folks,
Continuing with my Doing Something Useful series, I recently made some further useful changes in my home. There's no rocket science involved here but just my desire for convenience and some tidiness.
For a long time, I used to have the extension power bar powering my main desktop computer, monitor and printers resting on my desk. The power bar took up desk space and moreover, most of the cable used to rest on the floor, which required to be lifted up whenever I do any sweeping, vacuum cleaning or mopping. Also, I believe ants on the floor used to walk up the cable onto my desk.
Now some brands and models of these extension power bars, such as the ones shown here have holes for screws to pass through.
I then disconnected the power bar from the mains (please unplug the power bar before to avoid the risk of electric shock or electrocution if you decide to do similar work).
Found screws of the right length and thickness from my collection - i.e. it should protrude about 3 cm beyond the back of the power bar. In my case I used 2 inches (about 5.1 cm) long screws and 3cm long plastic wall plugs.
I then marked the screw holes to be drilled in the wall. A simple way to do this is to place the power bar where you intend to fix it on the wall, insert the screws in until they touch the wall and knock them gently with a hammer to mark the wall with indentations.
I then found a masonry drill of similar thickness as the wall plug, fitted it to me trusty electric drill, which I powered from another power plug through another extension (not the one I am going to fix to the wall) noted the part of the drill bit which was 3 cm in from the drill head, then drilled two holes of about 3 cm deep at the points I had marked earlier.
I then pushed plastic wall plugs into the two holes I had drilled and they went all the way in smoothly, with a nice fit.
I then inserted the two screws through the holes in the power bar and guided then to fit into the holes in the wall plugs already in the wall and using a phillips (cross-head) screwdriver of the right size, I screwed the power bar firmly to the wall, as you can see in the picture below, where you can see the two black screws.
And, below is the power bar with the plugs for my table lamp, computer monitor, computer and additional extension mini power bar for round a flat pin plugs, as and when needed.
I also manage the business e-mail and correspondence of a friend and neighbour with a small business and have dedicated another desktop computer for that purpose and likewise the power bar used to rest on the computer table which took up space.
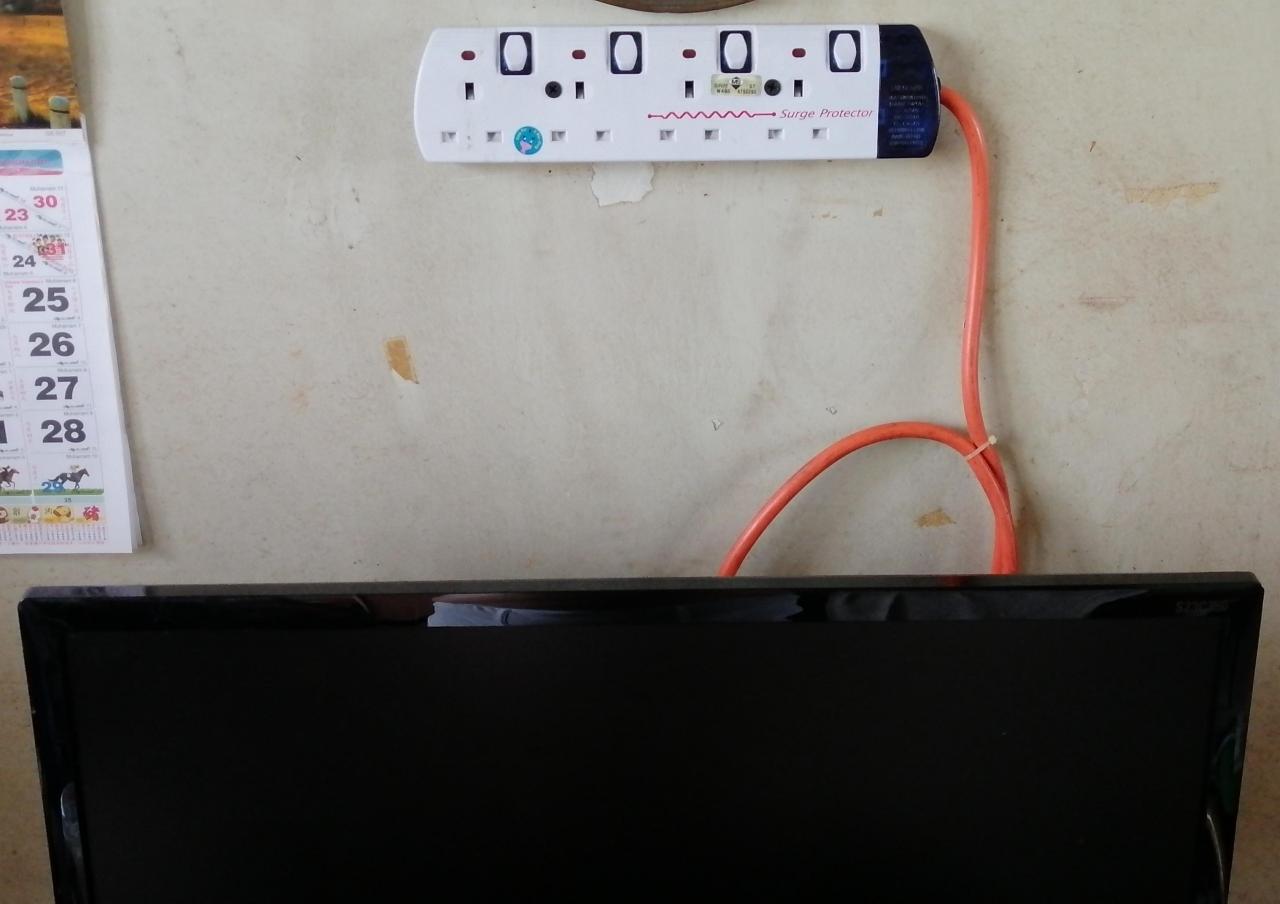
So out came my electric drill, drill bit, screws and wall plugs and in similar fashion, I mounted a 5-socket version of the 4-socket power bar above on the wall and mounted it to the wall as shown below and also secured the bar's cable to the wall with plastic cable clips as shown. In this case, I used 8 mm cable clips which I have but 10 mm would have been a better fit. I'll make it a point to get box of 10 mm cable clips the next time I'm in a hardware shop or a DIY shop. Whilst I did not show it in the picture of the power bar above for my main computer, however I did fix the cable to the wall in similar manner as shown below.
In this case the leftmost plug powers a fluorescent lamp (not shown) which I can use as and when needed, then plugs for the monochrome inkjet printer, the colour all-in-one (AIO) inkjet printer, scanner and copier, the computer monitor and the computer.
The whole set up of the second PC and printers is shown below. At least I got more space on the computer table.
Now you may be wondering how the PC above connects to the Internet. Well what is not shown in the picture above is a WiFi-USB adaptor (a dongle) plugged into a USB port at the back of the computer as in the picture below, which enables the computer to connect to my home WiFi router without messy LAN (local area network) cabling running all over my home.
This is not an advertisements for Tenda but below is the box of the same model or WiFi-USB adaptor, which I bought for RM30 from Sri Computer in Low Yat Plaza, Kuala Lumpur. This model has a high-gain antenna which has a longer range to the WiFi router.
Of course, there are many other brands and models of WiFi-USB adaptors you can choose from in the computer stores. Below are a few options, including a Tenda high-gain model I picked up from Sri Computer for RM28 instead of RM30.
And below is another is a Level One high-gain model
My mother bought me an electric drill after I completed Form 5, like way back in 1971 and I kind of taught myself to be a handyman of sorts around the house.
Once again, don't waste your life behind a computer or smartphone screen accessing social media and endlessly chatting about useless politics for hours. Instead, do something useful with your life.
Yours Truly
IT.Scheiss